Browse Guides
Move to another guide without going back to the documentation hub.
Connect WooCommerce with API Credentials
Use your WooCommerce store URL plus REST API credentials to connect the store, sync products and orders, and prepare Sabdov for review collection, widgets, and migration flows.
Pre-connection Requirements
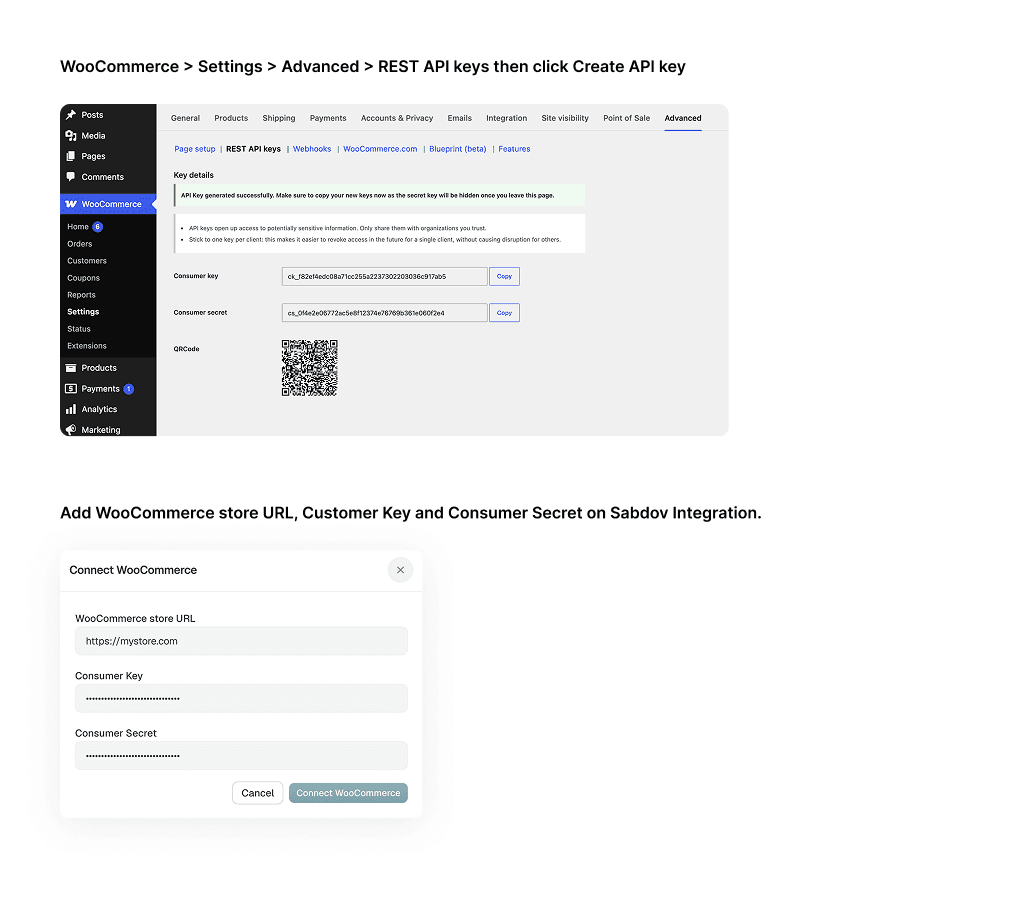
Before you begin, keep the following details ready from your WooCommerce store:
- Store URLYour full storefront URL, including https://
- Consumer KeyGenerated from WooCommerce REST API settings
- Consumer SecretGenerated with the matching Consumer Key
Connection Steps
Navigate to Settings
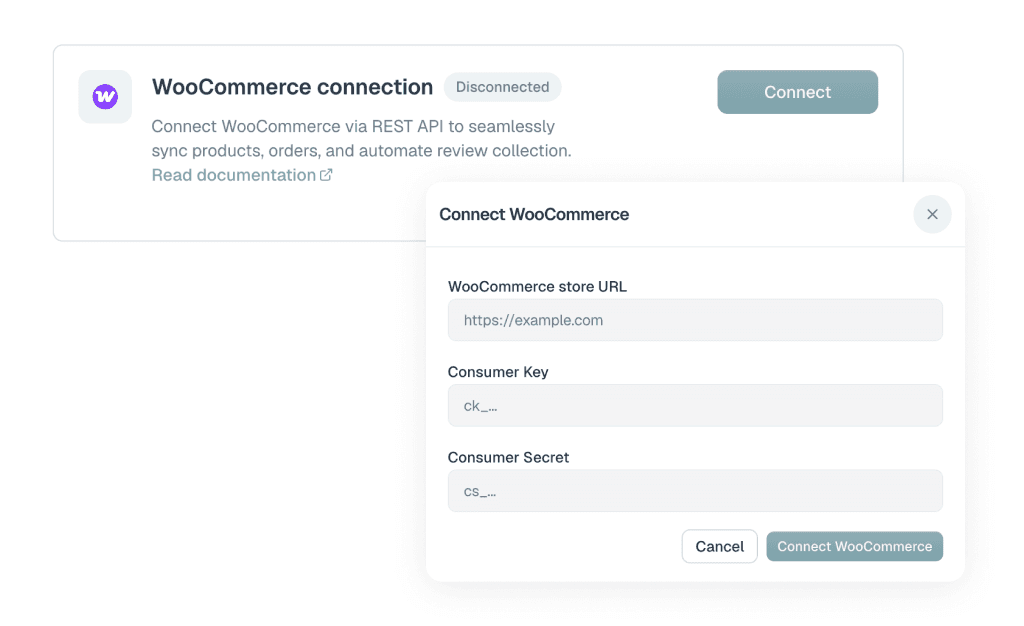
Log in to Sabdov, open Settings, and move to the Integrations section where the WooCommerce connection card is shown.
Enter Your Credentials
Click "Connect" to open the modal, then paste WooCommerce store URL, Consumer Key, and Consumer Secret into the matching fields. Include the full `https://` protocol.
Displaying the Widget on Your Storefront
Option 1: Using the Sabdov Plugin (Recommended)
The easiest way to display the Sabdov review widget in WooCommerce is by using our connector plugin. First, download the Sabdov WooCommerce plugin from the Settings > Integrations page in your Sabdov dashboard.
Plugin Installation Steps:
- Download the plugin
.zipfile from the Sabdov dashboard (the download link is located right next to the Read documentation link). - Log in to your WordPress admin panel, then navigate to Plugins > Add New.
- Click Upload Plugin, choose the downloaded
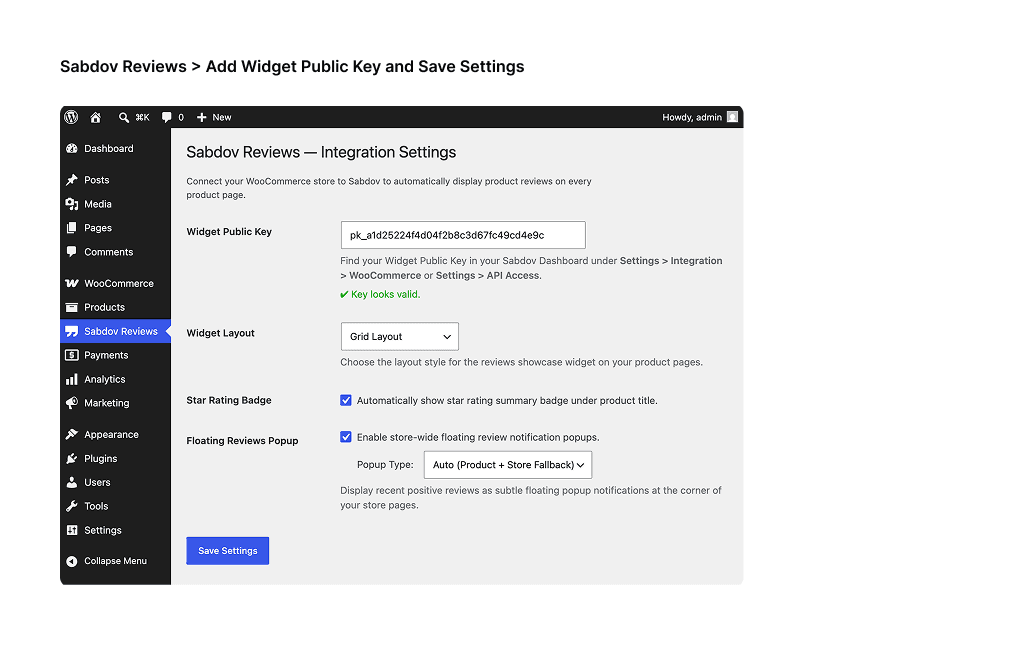
.zipfile, click Install Now, and then activate the plugin. - Go to the Settings > Sabdov Reviews menu in your WordPress admin sidebar.
- Enter your store's Widget Public Key (which can be copied from the Widget Public Key card under **Settings > API Access** in Sabdov) and click Save Settings.
The Sabdov review widget will now automatically render across all your WooCommerce product detail pages.
Option 2: Using a Page Builder (Elementor / Divi / etc.)
If you designed your WooCommerce store using page builders like Elementor Pro, you can manually place the widget using a custom HTML block.
Elementor Placement Steps:
- Open your Single Product Template in Elementor.
- Drag and drop the HTML or Shortcode widget to your preferred position (e.g., below Product Tabs).
- Paste the following custom HTML embed code:
<div class="sabdov-review-showcase" data-merchant-id="YOUR_WIDGET_PUBLIC_KEY" data-product-id="[wpbb post:id]"></div>
<script src="https://sabdov.com/widget.js" defer></script>Connection Status Reference
Troubleshooting
Invalid URL Format+
Missing or Invalid API Keys−
API Validation Failed (401 Unauthorized)+
Next step
Prepare your WooCommerce credentials, connect the store, and move into your first sync once the REST API connection is verified.
Was this helpful?